Most labrador crate and bed setups fail in a predictable order. Someone buys a big plush bed, drops it in a corner, and then wonders why the puppy ate a corner off it in nine days. Ten years of training labs taught me that the failure is almost never the dog. It is the sequence.
Get the order right and a lab settles fast: protect the floor first, give the dog a sleeping platform that actually fits, put the crate in the right place, and then do the behavior work that makes both spots boring. Get it backwards and you are buying bedding every few weeks and calling it bad luck.
This is the setup I run for my own two labs. Duke is a 75 pound black lab who chews first and asks questions later. Penny is an 11 year old rescue with hip dysplasia who needs comfort more than armor. Two very different dogs, one order of operations.
Why you should trust me
I spent 10 years as a trainer, mostly hunting labs and obedience dogs, and I have watched more labradors destroy more gear than most people will own in a lifetime. Kennel owners are harder on equipment than any family home, and they taught me what a chew timeline looks like measured in weeks rather than years.
Now I write reviews full time and I keep the notebook. Foam sink depth, cover wash counts, dates of failure. I have cut beds open to check density, because the label is marketing and the foam is the truth. Cheap foam runs around 1.5 to 2 pounds per cubic foot. Anything I recommend for a lab needs to be denser than that, and I measure before I write.
Two rules I hold to. I will not recommend a product that claims to be chew proof until I have put it in front of an actual chewer, and I will not review a bed I have not lived with for at least a month. I am not a vet. When I talk about Penny's hips, I am repeating what Dr. Alvarez told me, not diagnosing your dog.
And yes, I made the cheap bed mistake once, same as everybody. That is tuition. The smart move is only paying it once.
How I picked and how I tested
A crate and bed setup is two layers doing two jobs, and most people only buy one of them.
The floor layer takes the accidents, the drool, the water bowl spills, and the muddy paws. The sleeping layer takes the weight. A 75 pound lab sprawled flat, what I call the starfish position, puts load across the whole platform, not just the middle, so anything that sags in the corners is a pancake within a season.
So I checked both products below against the same short list:
- Does it fit the space honestly? I measure nose to tail and add 12 inches for a sleeping platform. For a crate, the dog should be able to stand and turn without ducking.
- Does it survive the washing machine? Zippers die first. I have killed more zippers than I want to count, and a cover that cannot be washed is a cover that smells like a kennel within a month.
- Does it stay put? A non slip base matters more than people think. A liner that slides turns into a chew toy and a puddle at the same time.
- Does it do one job well? The best setups use simple pieces instead of one overbuilt bed trying to be everything at once.
Both items below passed that list for my household. Neither is the most expensive thing in its category, and that is deliberate. The liner is a floor problem solved for the price of a bag of treats, and the elevated bed is a comfort problem solved without pretending it is armor.
The setup, layer by layer
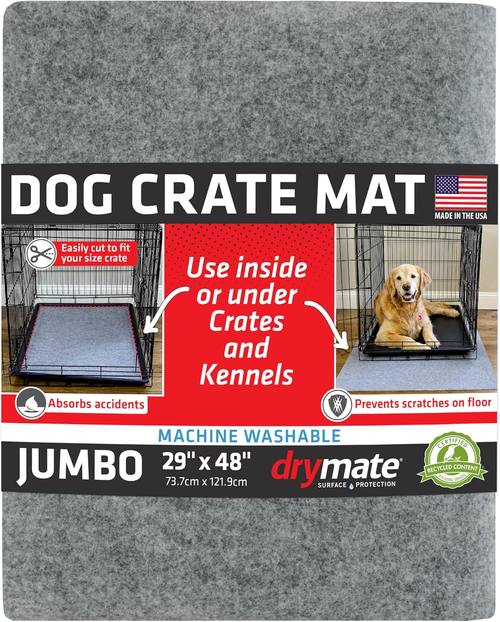
The floor layer: Drymate Dog Crate Mat Liner, Absorbs Urine, Waterproof, Non-Slip, Washable Puppy Pee Pad for Kennel Training - Use Under Pet Cage to Protect Floors, Thin Cut to Fit Design (USA Made) (LGrey)(29"x48")
 Visit on Amazon →
This is the piece people skip, and it is the piece that saves the floor. It absorbs urine, it is waterproof, it has a non slip backing, and it is machine washable. The cut to fit design is what makes it work in a real house: you trim it to your crate footprint instead of hunting for a mat in a size nobody stocks.
Use it under the crate tray, under the bed for a senior dog who leaks a little, and in the car crate. A puppy in the shark phase will have accidents. The liner is how you stop those accidents from becoming a floor repair.
One caveat, and it is the same caveat I give everybody. This is a thin liner, not a cushion. It does not add padding. If you want the floor layer to double as a mattress, you bought the wrong product and you will be disappointed by design, not by defect.
Who it is for: anyone crate training a lab puppy, anyone with a senior lab who drips, and anyone whose lab thinks the water bowl is a toy.
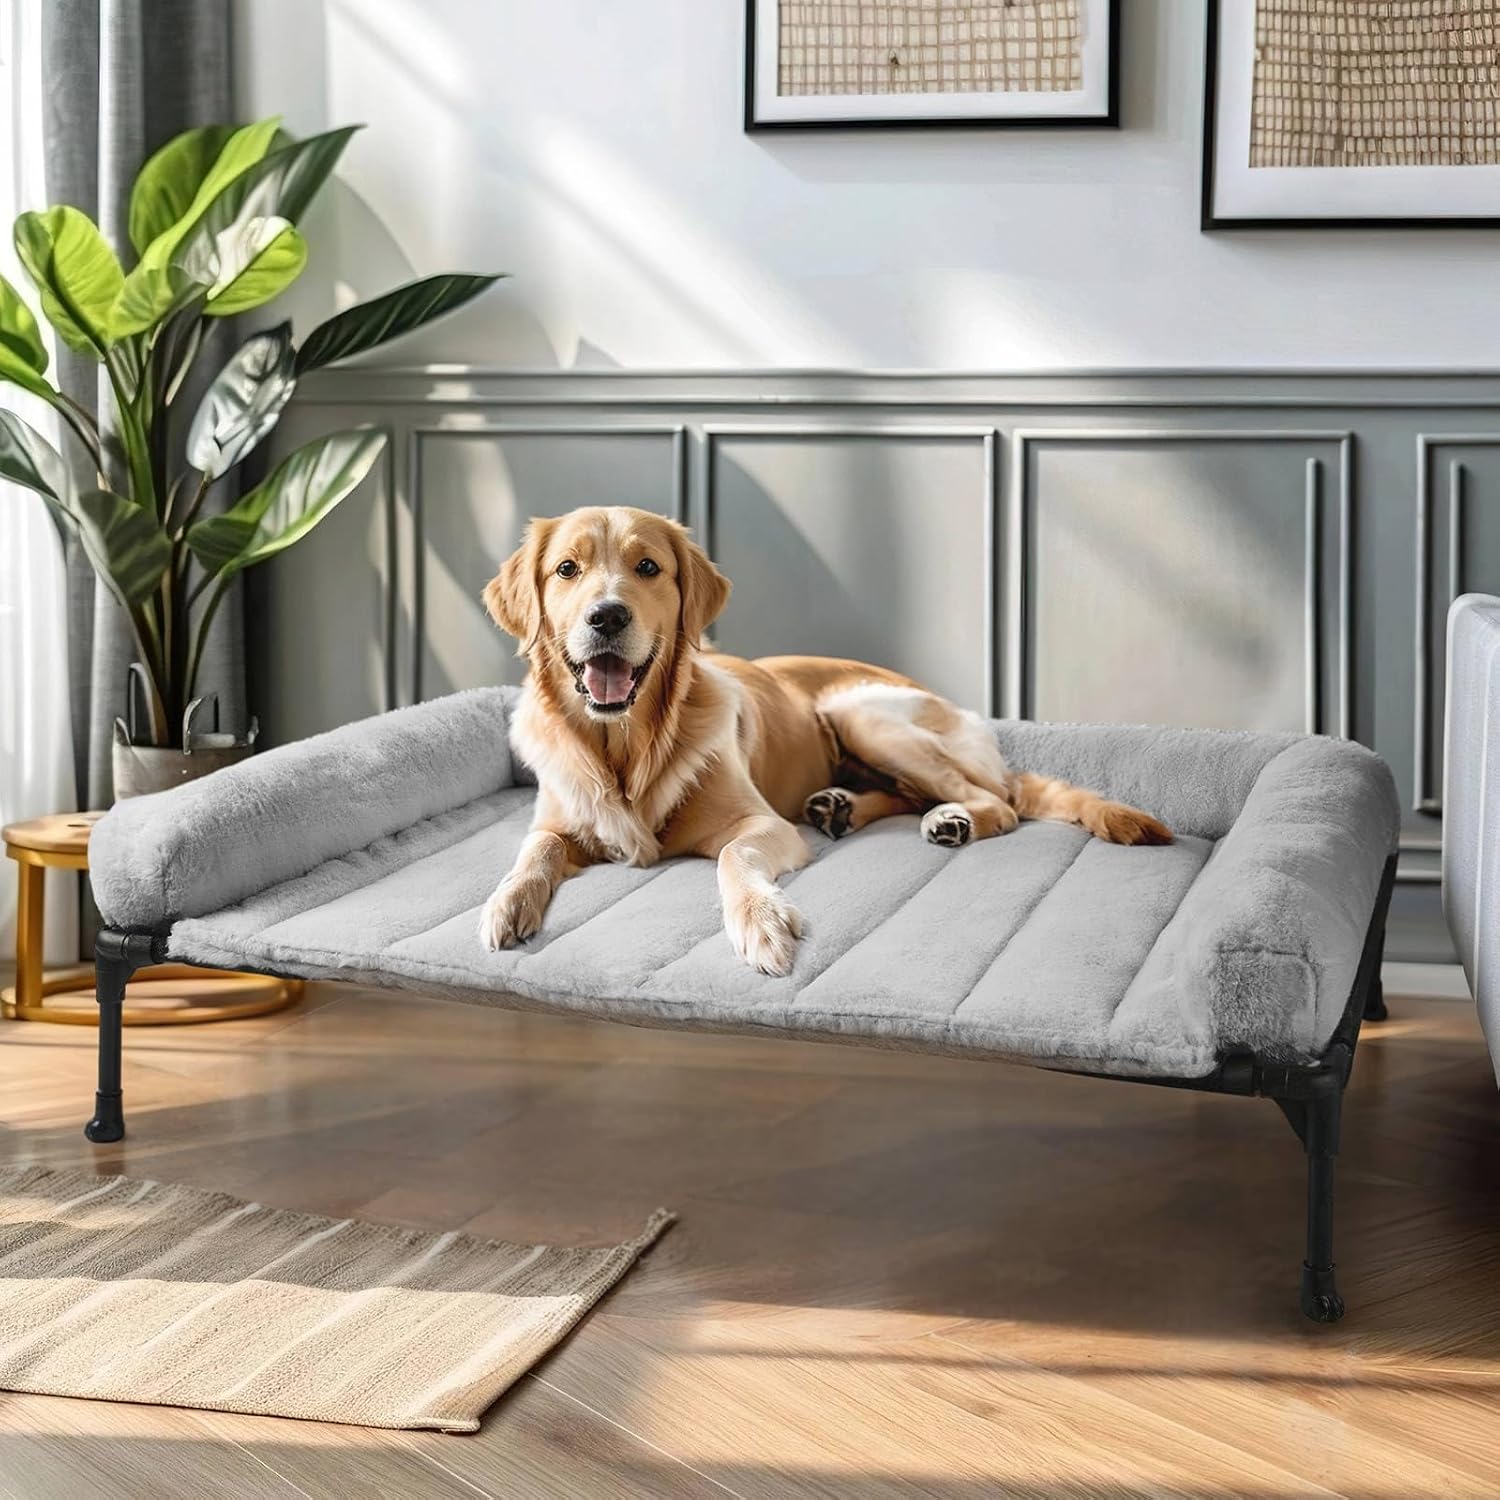
The sleeping platform: Veehoo Elevated Dog Beds Large Sized Dog with Fluffy Plush Bolster Cushion
 Visit on Amazon →
An elevated bed with a plush bolster gives you two things a flat mat cannot. Air moves under the platform, which matters in an Ohio summer and matters more for a dog carrying weight on old hips. The bolster gives a lab something to lean against, which is how a lot of big dogs actually sleep when they are not sprawled flat.
This is the comfort layer. It is not the chew proof layer, and I want to be honest about that up front. Plush anything plus a lab under 3 years old is a gamble. Duke would have had that cushion open in an afternoon at two years old. Penny, at 11, uses a bolster exactly the way it was designed to be used.
A few practical notes. Measure the platform against your dog's starfish footprint, not against the dog standing up. And put the elevated bed where the dog can see the room, because a lab that cannot watch the family will not use the bed, he will use the couch.
Flaws but not dealbreakers: The plush bolster is the first thing a determined chewer will target. If your lab is under 3, treat this as a supervised bed, or wait until the chewing settles.
Who it is for: senior labs, calm adult labs, and any dog whose joints complain on cold floors.
The actual setup, step by step
Step one: measure the dog, not the label. "Large" means nothing. Nose to tail, then add 12 inches for a sleeping platform so your lab can sprawl. For the crate, the dog needs to stand up without ducking and turn around without folding. Write the numbers in a notebook. You will need them again when you replace something.
Step two: pick the crate spot before the crate. A crate in a high traffic hallway is a crate nobody sleeps in. Corner of the room, two walls, clear sightline to the door. That is the spot. A lab wants to watch the house while he rests, and if he cannot, he will pace instead.
Step three: lay the floor layer first. Trim the liner to the crate footprint or the bed footprint, waterproof side doing its job, non slip side down. Get the corners right. A liner that bunches is a liner that gets chewed.
Step four: set the crate up boring. No plush toys in the crate at first, no fluffy bedding a puppy can shred and swallow. A crate with one chew toy and a thin liner is a crate a puppy learns to sleep in. A crate with a plush bed is a crate a puppy learns to redecorate.
Step five: put the sleeping platform where the dog already rests. Watch your lab for a day. He already has a spot. Put the bed there, not where the bed looks good in the room. The fastest way to waste money on a bed is to place it where you want it instead of where he wants it.
Step six: do the behavior work. A puppy is not chewing to be bad. He is chewing because chewing is what puppies do. Your job is to make the bed boring and the chew toy interesting. Every time he puts teeth on the bolster, redirect to the toy. That is the whole training loop, and it takes weeks, not days.
Step seven: wash on a schedule. Covers get washed every two weeks in a lab house, more if the dog is a drooler. Zip every zipper before it goes in, and air dry anything whose foam cannot take heat. Zippers are the first thing to fail, and a broken zipper is what turns a good bed into a floor mat.
Step eight: inspect weekly. Run a hand along the seams and the bolster. Loose stitching and a small tear become a hole in a lab's mouth in about an hour. Catch it early and you get another year out of the bed.
What I would not put in a lab setup
Donut beds. A 75 pound lab does not curl up, he sprawls, and a donut bed is a pancake with walls.
Plush beds for a lab under 3. Stuffing everywhere. I have vacuumed foam out of a rug more than once, and I have thrown away more plush bedding than I care to admit.
Cheap foam mattresses that flatten in a season. If you can press your palm into the foam and feel the floor through it, that foam is not dense enough for a lab's weight, and your dog is sleeping on the floor with extra steps.
Anything marketed as indestructible. That word on a product page is a red flag, not a feature. Nothing is indestructible to a determined lab. Durable is a real claim you can test. Indestructible is a marketing department writing checks the foam cannot cash.
What this all costs
The honest math is cost per day, not sticker price. Take what you pay, divide by the days it lasts, and compare that number. A cheap bed that dies in four months is more expensive per day than a good bed that lasts three years, and the cheap one also costs you a weekend of vacuuming and one trip to the vet if your lab swallows the stuffing.
That math is why I like this two layer approach. The liner is the cheap part and it protects the expensive part, which is your floor. The elevated bed is the comfort part, and it does not need to be chew proof if your lab is past the shark phase.
Both items above are on Amazon. Check current Amazon price on each and run your own cost per day with your own dog's chew timeline in mind. If your lab is under 3, the liner and a boring crate come first. If your lab is a senior with stiff hips, the elevated bed with the bolster comes first and the liner handles the accidents.
That is the order. Floor, platform, crate, behavior. Get it right once and you are not buying bedding again in four months.