A waterproof Labrador crate setup is not complicated, but almost everyone builds it backwards. They buy the bed first, drop it in the crate, and then spend six months scrubbing the crate pan and the carpet underneath it. I have watched this happen in kennels, in client homes, and in my own living room with Duke and Penny.
The order is the whole trick: protection on the bottom, comfort on top, and a washing routine you can actually keep up with. Get that order right and a lab puppy can pee in his crate at 2 a.m. and you are back in bed in ten minutes instead of dragging a crate pan out to the driveway with a hose.
This guide covers the two pieces of gear I would buy first, how to size them for a labrador, and the exact setup I use for a new puppy or for a senior dog who has started having accidents.
Why you should trust me
I spent ten years as a trainer working with hunting labs and obedience dogs before I started writing about dog gear full time. Duke is a 75 pound black lab who chews anything he can reach, and Penny is an 11 year old rescue with hip dysplasia who taught me more about foam than any product label ever did. I keep a notebook with foam sink depths, chew timelines, and dates of failure. I have cut more beds open than I can count.
I will also tell you the limits. I am a trainer, not a vet. When Penny's hips got bad, I asked Dr. Alvarez what she wanted in a bed and she gave me one answer: dense support, not fluff. Everything below is built around that answer plus what survives a 75 pound lab.
Why the layering order matters
Two pieces of gear, two different jobs, and they fail in different ways.
The liner's job is liquid. Puppies leak, seniors leak, and a lab who just came in from the yard and drank a quart of water will leak. A waterproof liner catches that before it reaches your crate pan, your subfloor, or your carpet.
The bed's job is weight and joints. A 75 pound lab puts concentrated pressure on his elbows and hips every time he lies down. Thin batting and cheap foam flatten into a pancake in a couple of months, and once a bed is a pancake it is not a bed, it is a mat with a story.
Here is the part most people miss: even a waterproof bed is usually only waterproof at the fabric, not at the seams and the zipper. Liquid finds the zipper. So the liner is not a backup for a bad bed, it is the first line of defense for a good one. Put the liner down first and the bed on top and you stop the leak before it becomes a floor problem.
If your lab is under three years old, this matters more, not less. The shark phase is real, and a puppy alone in a crate at night is a puppy with time on his hands.
Sizing before you spend a dollar
Measure your dog, not the crate box. I go nose to tail with a soft tape, then add 12 inches. That is the minimum interior length for a lab to sprawl, and labs sprawl like starfish, legs in four directions, not curled in a ball. Donut beds are a joke for this breed.
Then measure the crate pan, because that is the surface the liner actually has to cover. A thin cut-to-fit liner is forgiving here, which is the point. You trim it to the pan instead of hunting for a size that matches.
And check the foam before you trust a bed with a senior lab. Foam density is measured in pounds per cubic foot. Cheap beds run 1.5 to 2. Dense orthopedic foam starts around 3 and goes up. If a listing will not tell you the density, that is your answer.
The gear I would buy first
Two pieces, and neither one is expensive. Buy them in this order.
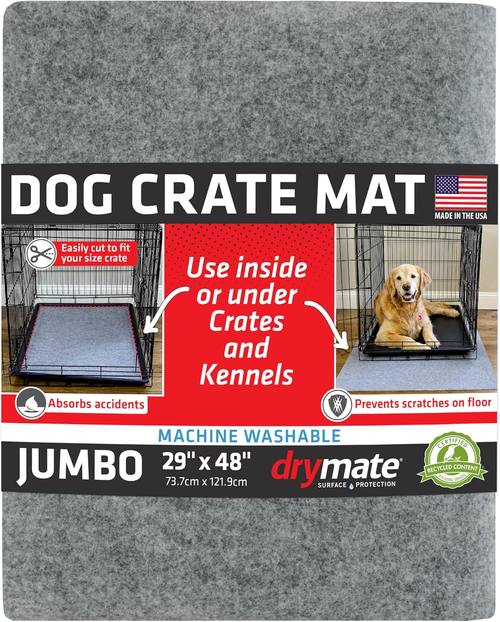
The floor protector: Drymate Dog Crate Mat Liner
 Visit on Amazon →
This is the piece people skip, and it is the piece that saves the floor. The Drymate liner is built to absorb urine, with a waterproof backing and a non-slip base, and it is machine washable, which is the only feature that matters at 2 a.m. It is made in the USA and comes in a 29 by 48 inch size in light grey, with a thin cut-to-fit design so you can trim it to your crate pan or run it under the whole crate to protect the floor.
Thin is the right call here. A thick pad under a crate pan makes the pan rock, and a rocking pan is noise at night. This one lays flat.
Flaws but not dealbreakers: It is not a cushion, and it is not supposed to be. It is a barrier. If your lab is a dedicated chewer, keep it under the pan or under the bed where teeth cannot reach the edge, because no fabric on the market survives a bored 2 year old lab left alone with a loose corner.
Anyone crate training a puppy, or managing a senior lab who has started having accidents, should own two of these: one in the crate, one in the wash.
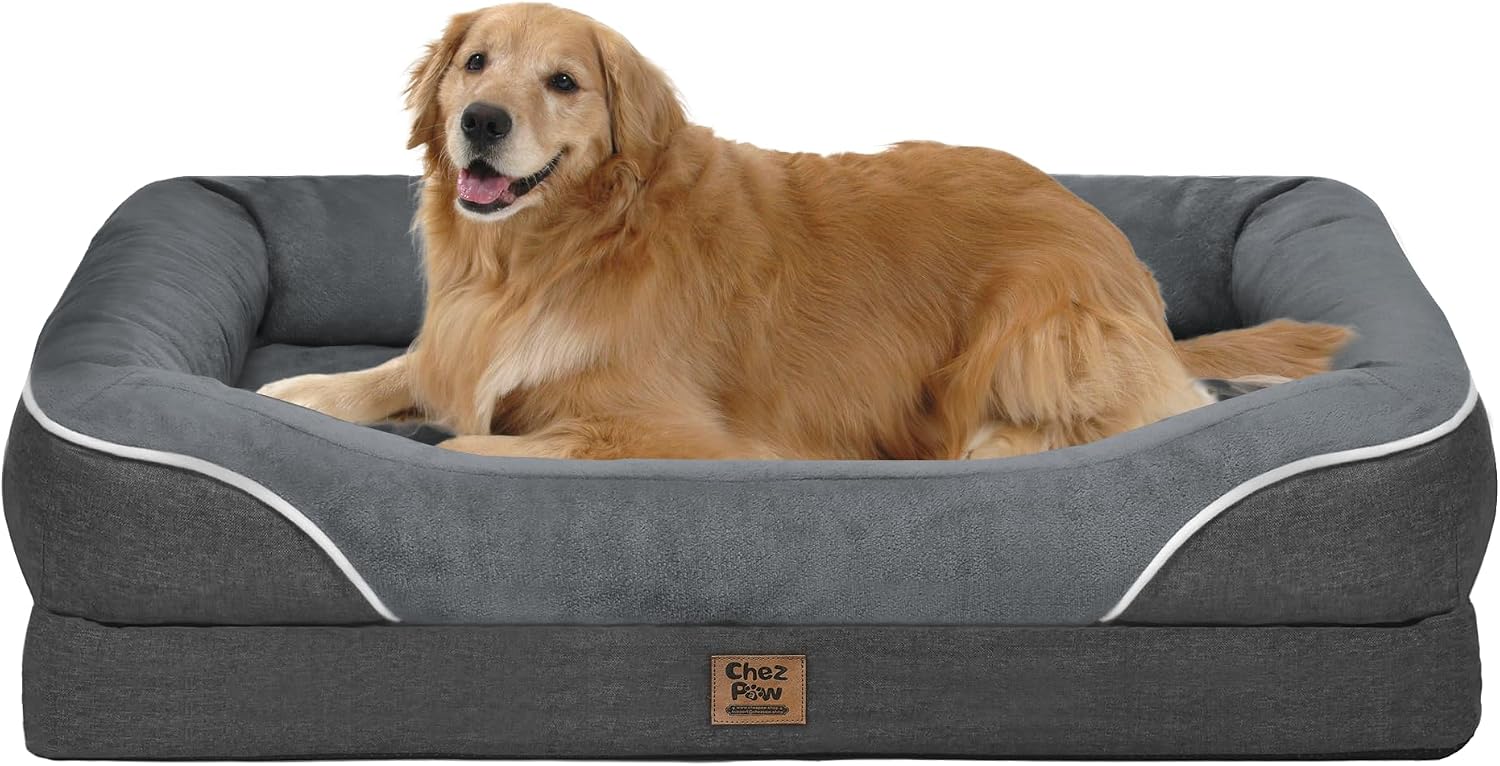
The bed that goes on top: Chez Paw Waterproof Orthopedic Dog Bed for Large and Extra Large Dogs
 Visit on Amazon →
This is the comfort layer, sized for large and extra large dogs with a waterproof cover and orthopedic foam, which is exactly the combination you want inside a crate or next to one. A waterproof cover means accidents wipe up instead of soaking in. Orthopedic foam means the bed is still doing a job for elbows and hips after the novelty wears off.
I will be straight about where this fits. This is a budget bed, and I treat budget beds as starter beds. For a puppy in the shark phase, a budget bed on top of a good liner is the smart play, because the liner is the part that survives the chewing and the peeing while the puppy grows out of it. For a light chewing adult lab who just needs a waterproof, supportive place to sleep, it covers both jobs at once.
What I would not do is hand this to a determined 75 pound chewer and walk away for eight hours. No bed wins that fight, and any listing that tells you otherwise is selling you something.
Flaws but not dealbreakers: A waterproof cover lives and dies by its zipper. Check the zipper track when it arrives, and if the cover feels loose at the seam, exchange it before the return window closes. Budget orthopedic foam is also not the same as the dense stuff I buy for Penny. If your lab is a senior with diagnosed hip issues, ask your vet and plan on spending more later. For a puppy or a healthy adult, this is a sensible first bed.
Anyone who wants one bed that handles a wet dog, a clumsy sleeper, and a crate floor without a puddle underneath it will get their money's worth here.
The setup, step by step
Now the part you came for. This works for a new puppy, a newly adopted adult lab, or a senior who has started having accidents at night.
Step one: pick the spot. Flat floor, out of the walking path, away from a heat vent and away from direct sun through a window. A crate that sits in a traffic lane gets bumped all night and your lab will never settle. A crate on an uneven floor rocks and squeaks.
Step two: measure the pan and cut the liner. Set the liner on the floor, set the crate pan on top, and trim so the liner does not bunch at the corners. Bunching is what makes a dog dig at the bedding, and digging turns into chewing. If you are running the liner under the crate to protect hardwood, leave an inch of overhang on each side and trim the rest.
Step three: liner down, crate on top, bed inside. Layer it in that order every time. The liner takes the liquid, the crate pan catches anything the liner misses, and the bed sits inside the crate on top of the liner. If your crate has a tray that slides out, put a second cut liner inside the tray itself so cleanup is a swap, not a scrub.
Step four: leave a bare strip at the front. Do not fill the entire crate with bed. A lab that is too warm will push the bed into a corner and sleep on the pan, and a lab that is bored will chew whatever is closest to the door. A bare strip gives him a place to dig, rearrange, and cool off without destroying the bed.
Step five: make the bed boring and the chew toy interesting. This is behavior, not product. Feed meals in the crate, put the good chew toy in with him, and do not turn the crate into a playpen. A puppy chews because chewing is what puppies do. Your job is to redirect, not to buy a tougher bed every three weeks.
Step six: wash the liner weekly, whether it looks dirty or not. Urine residue you cannot see is what makes a crate smell, and smell is what makes a dog refuse the crate. Cold water, gentle cycle, air dry or low heat. Hot water and high heat are what kill the waterproof backing and the zipper. I have tested 14 broken zippers, and most of them died in a dryer.
Step seven: check the foam monthly with your hand, not your eyes. Press the middle of the bed with your palm. If your hand sinks to the floor with no resistance, the foam has pancaked and it is time to replace it. A flat bed under a 75 pound lab is worse than no bed, because it puts his elbows straight onto the crate pan.
What this actually costs you
Do the arithmetic before you buy, not after. Take the price on the page, divide it by the number of days you expect the product to last, and compare that number to the cost of replacing a cheap version every few months. A bed that dies in four months is more expensive per day than a bed that lasts three years, and that is arithmetic, not opinion.
The liner is the cheapest insurance in this whole setup, because it protects the floor and the subfloor underneath it. A water stain on hardwood is a repair bill, not a cleaning job. Check current Amazon price on the liner, check current Amazon price on the bed, and compare both against the cost of one floor repair.
Mistakes I see over and over
- Buying the bed before the liner. The bed is the fun purchase, the liner is the one that saves your floor.
- Trusting the word "large" on a listing. Measure nose to tail, add 12 inches, then compare.
- Washing waterproof gear on hot. You will cook the backing and kill the zipper.
- Buying an expensive bed for a puppy under three. Buy durable and affordable now, buy the good orthopedic bed when the chewing stops.
- Leaving a torn corner in the crate. A loose edge is an invitation, and one small tear becomes stuffing on the floor by morning.
The bottom line
A waterproof Labrador crate setup is two pieces of gear, one order, and one routine. Liner down, bed on top, wash the liner weekly, check the foam monthly. That is the whole system, and it costs less than one floor repair.
If your lab is a puppy or a young chewer, start with the liner and a budget bed and expect to replace the bed once he grows out of the shark phase. If your lab is a senior with hip trouble, talk to your vet about dense orthopedic foam and treat the budget bed as a temporary stop. Either way, put the protection down first. Your floor, your nose, and your 2 a.m. self will thank you.